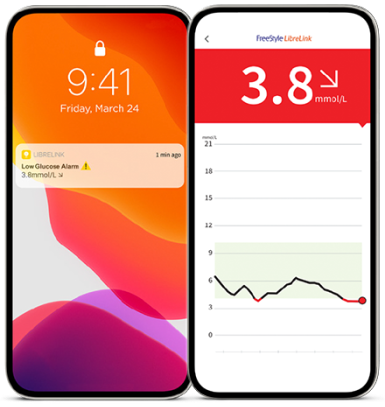
When your patient chooses to get notifications through the FreeStyle LibreLink app◊, they can set up alarms so they can be alerted when their glucose reading goes above or below their target range.¤
5x more readings
5x more readings power up to 5x faster alarms4 that let your patients know the minute their glucose is too high or too low.¤
Easy to set up and use
Optional glucose alarms are easy to turn on, easy to customise low and high glucose alarm ranges and easy to adjust sound and vibration.5
Increased device use
New FreeStyle Libre 2 users value the ability to control alarms — patients who switched from other CGMs saw a 44% increase in device use "all or almost all of the time".6,7 Other CGM users are 2x more likely to turn off their device* due to excessive alarms.6,7
How It works
Alarm
When your patient receives a glucose alarm, they can open the FreeStyle LibreLink app or tap the Dismiss button to dismiss the alarm.
Act
They can then use their glucose reading, trend arrow, and 8-hour history to take appropriate action as their Healthcare Professional advice.

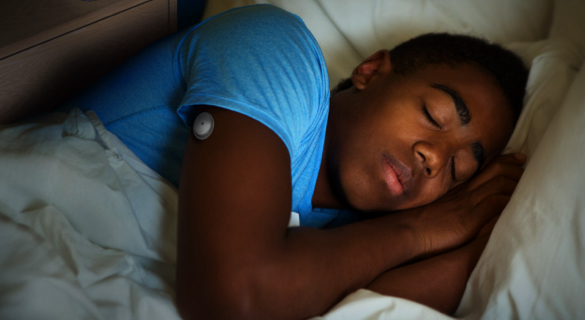
It even works when they're sleeping or when their smartphone is in Do Not Disturb mode.¤
iPhone users who use Focus Modes will need to make sure Time Sensitive Notifications are turned ON for each focus mode.
Your patient will need to decide which device they want to receive their alarms on. This is an important first step as they can only receive alarms on the device they start their FreeStyle Libre 2 sensor with.

How To Set Up Alarms
Once your patient has started their FreeStyle Libre 2 sensor with the FreeStyle LibreLink app,◊ they can follow the instructions below to receive alarms.
1.
Tap alarms in the menu1
1.
Tap alarms in the menu12.
Tap Low Glucose Alarm and turn on alarm (alarms are off by default)
2.
Tap Low Glucose Alarm and turn on alarm (alarms are off by default)(Signal loss alarms automatically turned on when glucose alarm is turned on)
3.
Scroll to select Low Glucose Value2
3.
Scroll to select Low Glucose Value24.
Tapping Alarm Tone and make tone of choice
4.
Tapping Alarm Tone and make tone of choice5.
Set High Glucose Alarm using the same steps3
5.
Set High Glucose Alarm using the same steps3If your patient wants to receive alarms on the FreeStyle Libre 2 Reader, see the FreeStyle Libre 2 system user manual for information about setting up and using alarms.
How to activate alarm notifcations
To receive optional glucose alarms on their smartphone, your patient needs to make sure they have notifications enabled for the app. If they didn't enable all notifications and permissions during app set up, how they do it now depends on their phone's operating system.
Enable notifications on iPhone
-
Do not force close the App.
-
Check to make sure that you have the correct settings and permissions enabled on your phone to receive alarms.
-
Enable Bluetooth and allow the App to access Bluetooth.
-
Allow Notifications for the App. Turn on Lock Screen and Banner alerts, Notification sounds and general phone sounds or vibration. Make sure not to turn on any features or modify phone settings that may interrupt the presentation of notifications.
-
Turn off Do Not Disturb mode or select to turn on Override Do Not Disturb in your alarm settings. Do this if you want the alarm to always play a sound and appear on the lock screen even if your phone is muted or Do Not Disturb is on.
Note: You must accept the App's permission request for Critical Alerts to use this feature. You can also enable the Critical Alerts setting directly from the App's notification settings.
Enable notifications and location permissions on Android
-
Enable Bluetooth and allow Nearby Devices permission for the App (Nearby Devices permission is required for Android 12 and above).
-
Do not force close the app.
-
Allow Notifications for the App. Turn on Lock Screen notifications, Notification sounds, Channel notifications, Sound and Pop-up notifications, and general phone sounds or vibration. Make sure not to turn on any features or modify phone settings that may interrupt the presentation of notifications.
-
Turn off Do Not Disturb mode or manage the settings for your alarms to override Do Not Disturb. Override Do Not Disturb functionality depends on the phone model and Android operating system version you are using.
-
Allow Alarms & reminders permission for the App. This permission is required for Android 12 and above.
-
Turn off Battery Optimisation for the App to allow the App to run in the background and ensure that you receive alarms, even when your phone has low battery. You may need to add the App to the list of apps that will not be put to sleep.
How to make sure patients don’t miss alarms
There are some things your patients can do to make sure they don't miss any glucose alarms:
Make sure their phone is within 6 meters of them at all times, unobstructed
Do not force close the FreeStyle LibreLink app - let it run in the background
Have Override Do Not Disturb enabled in alarm settings¤
References & Disclaimers
Images are for illustrative purposes only. Not real patient or data.
◊ The FreeStyle LibreLink app is only compatible with certain mobile devices and operating systems. Please check the website for more information about device compatibility before using the app. Use of FreeStyle LibreLink may require registration with LibreView.
¤ Notifications will only be received when alarms are turned on and the sensor is within 6m unobstructed of the reading device. Users must have override do not disturb settings enabled to receive alarms and alerts on their smartphone.
1. For full instructions please refer to the FreeStyle LibreLink User Manual.
4. Dexcom G6 CGM User Guide and Medtronic Guardian Connect System User Guide.
5. Data on file, Abbott Diabetes Care, Inc.
6. Patient satisfaction and physician preferences reported for FreeStyle Libre 2, Dexcom G6/G5/G4, Eversense, Medtronic Guardian Sensor 3 and Enlite Sensor, and Medtrum A6TouchCare.
7. Varughese, B. Diabetes Stoffw Hertz 30 (2021): 231-242.
* Compared to FreeStyle Libre 2.
ADC-91859 v1.0 05/24


